Monday, February 25, 2013

Hardwood Floors and Getting Crafty in the Nursery

Last week we hit a major turning point in the nursery design.  Hardwood floors were installed.  On the second floor.  In 2 days.  By my husband.  I helped a little, but being 7 months pregnant, I really could only do so much, so I have to give him all the credit.  What an amazing man he is.  He ripped up the old carpet and padding, pulled about 3,000 staples out of the sub floor, and installed a whole bedroom of hardwood flooring.  We still need to install the quarter round, but Rome wasn't built in a day and it'll get done shortly.  For now, I will admire the beautiful new wood floors in baby boy's room.


We've got plans for that dead space dormer window.  Can't wait to get started on that project.


Our next hardwood floor install will be in our master bedroom.  We should have that done in the next couple of weeks.  I for one, can't wait.  My husband on the other hand, not looking forward to that job!

I have been working on several other projects throughout the nursery, but the biggest one I can't wait to check off of my list is this old cabinet.  It was a big white box of nothing with not much going for it.  Hopefully, once I'm done it will be a fun, whimsical piece for the nursery.  Here's a little look at what I'm up to.


Can you see where I'm going with this?  Love this stencil(used it on my stair risers last summer) and have high hopes for this cabinet now!


Monday, February 11, 2013

Nursery Dresser: Before and After

I have shared my design plan for the nursery, and it included a gorgeous vintage dresser that I found for inspiration a few months ago.  I made it my mission to find another similar to it, and low and behold one was waiting for me on Etsy!  I purchased it from Florida and it finally delivered to me last week in Virginia.  The dresser is a Hollywood Regency style with faux bamboo details.  The lines were perfect for what I wanted, however I wanted to give it a little bit of a facelift.  


The yellow and white paint just didn't work for our nursery, so with the help of my amazing friend Connie, we spruced it up and I couldn't be happier with the results!


I replaced the knobs on the top drawers with pretty glass knobs I found at Hobby Lobby.  Drawer pulls can be a little harder to replace on vintage furniture because the measurement between the holes sometimes vary from those that are made today.  I also really liked the look of the existing pulls, so I decided to spray paint them silver.  I've never used metallic spray paint before, but what a pleasant surprise!  It went on so nicely and now I'm wondering what else we can paint silver!


The silver spray paint is made by Rustoleum and it has a nice, soft silver hue to it.  Nothing too shiny and bright.


The Hobby Lobby knobs for $3 each!  Can't beat that!  


I also painted this gorgeous mirror a few weeks ago.  It had a beautiful white washed finish on it, but I wanted a crisp white to go with the rest of the details in the room.  

Another small project was the lamp.  When I bought it, it had the white glass base and plain white shade.  My mom gave me the most gorgeous vintage tape trim(found on Etsy) for Christmas that we were so lucky to find in turquoise, navy and white!  It was just enough trim to add to the lamp shade to dress up just a bit.


I am so excited with the progress of the nursery so far!  We picked up our hardwood floors last week and plan to install them within the next couple of weeks!  Once that's done, we will really be on a roll with wrapping this room up.

Friday, February 1, 2013

A boy's (sort of) nautical nursery

As soon as we found out we were pregnant, I was already planning nurseries in my mind.  What would it look like if it were a girl?  What would I do that was a little more unique for a boy?  Since finding out we were having a boy, I really wanted to do a nursery that was a little unexpected, but still very "boy".  I wanted to stay away from the usual sports themes, and those of the like.  The funny thing is that I debated for weeks what the color schemes would be for boy/girl and the night after our ultrasound confirming we were having a boy, the scheme hit me like a ton of bricks!  Turquoise and Navy.  A not so expected color combination with a little nod to nautical.  Perfect for my baby boy, but a palette that will grow with him throughout the years.


Planning a nursery feels a little like a whirlwind adventure.  You think in the beginning that you've got plenty of time.  9 months?  Hah!  That's easy, right?  Little did you know how quickly time flies when anxiously awaiting baby...and furniture deliveries!  This is what we've got so far for little man's nursery.  Like I said, there will be small nods to a "nautical" theme, but nothing over the top.  I've got navy coral prints that my talented friend Elizabeth made to replace those boat photos that came with the frames.  I was just anxious to get the frames on the wall!


We've received our Pottery Barn crib, our cute little custom rocker, and I've checked window treatments off of my list.  But there is still a ways to go.  We've got to install hardwood floors.  Something that's been on out to-do list for a while, and this is just the kick we need to get it done.  

We're waiting on a vintage dresser I ordered from Etsy, still have to build a window seat/toy chest, need to make the crib skirt, purchase mattress, and the list goes on and on.  


I'm happy with what we've got so far, but looking forward to putting the whole picture together.  Once we get the hardwood floors and the super cute rug down, I think things will really start coming together.


The last major piece we are still waiting to arrive is the vintage dresser.  It's a hollywood regency style with faux bamboo detailing.  I plan to paint it to look like this one.

Once we get the dresser, the real fun starts and we can put together all of the final details!  Frames, decorative accessories, bedding, pillows, wall art, and a gorgeous mirror I have been working on.

I've got a few little projects I have been working on and will come back and share them with you in the next couple of days.  

Monday, December 10, 2012

It's a Boy!

We are so excited to announce that we are expecting a baby boy!!  We went last week for our ultrasound and I have to say it was the most amazing thing my husband and I have ever seen!  He wiggled all around while we watched him in 4D and is already melting our hearts.  Now the wait til May is on!  

Since we found out we are expecting a boy, I have been having so much fun putting together a nursery plan.  I have officially decided to go with a navy and turquoise blue color scheme.  

The first piece I have ordered is this rug from Land of Nod.  I've had it on my wishlist for months and months whether we found out we were having a boy or girl, it was going to go in the nursery.

I hope to find a dresser similar to this one.  Most of the furniture in my house is vintage but they all lean towards the girly side, so I love that this hollywood regency style dresser is a vintage piece, but with cleaner lines that can fit into a boy's room.  

I plan to make the window treatments myself, and will likely go with a stripe like this one.  I may even do wider navy and white stripes by making my own fabric which can be done by sewing together wide strips of fabric together horizontally.


I really love this crib from Pottery Barn, but am also leaning towards the Fillmore crib.


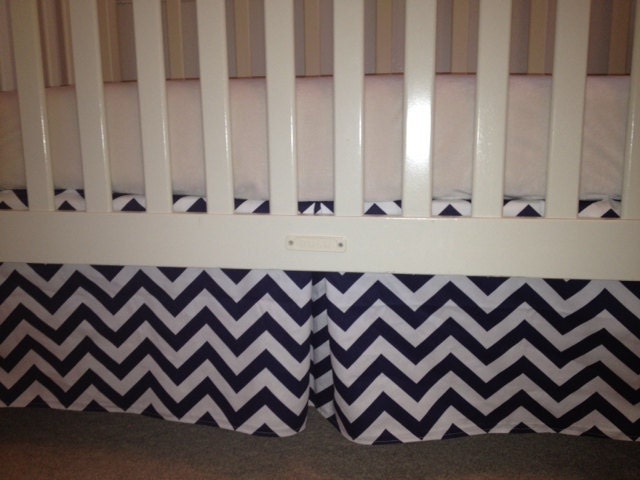
I also plan to make my own bedskirt, likely out of this navy and white chevron fabric which my husband really loves.
(find this skirt here)

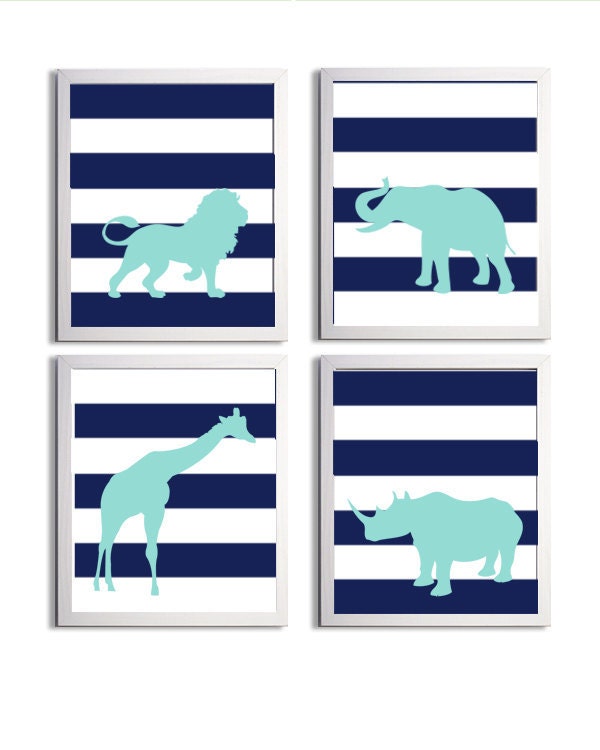
The artwork really ties the color scheme together.  I have found a few that I love on Etsy, but talked to my friend Elizabeth who has a digital etsy shop and she may end up putting something together with me.  I'm having a hard time deciding whether I want to go nautical, or just with animals.

I have so many ideas and possibilities swirling around in my head so any of this may change at any time!  Here's a few more goodies that have caught my eye and would fit nicely into the nursery.

So there you have it!  Our first baby's nursery plan :)  


Tuesday, December 4, 2012

Baby on Board

If you're a fan on Facebook, you've already seen the big news.  If not, I am so excited to announce that we are expecting our first baby!!


Needless to say, with everything going on lately, I've been M.I.A. from blogging.  We find out this week what the gender of our baby will be which to me is one of the most exciting events in a pregnancy!  Some choose not to find out, but I am like a kid on Christmas morning who just can't wait!  This opens up a whole new world of planning.  Now we can finally start decorating the nursery which will be a load off of my mind.  The only problem for me is committing to one color scheme and one style.  I mean, this is my very first nursery and you only have that once so I want it to be perfect!  

Can't wait to come back and share the gender!  Also, don't be surprised to see lots of nursery ideas coming up.

Monday, September 10, 2012

Officially my favorite room in the house

As the summer draws to a close, I find myself doing a lot of "fall cleaning" instead of "spring cleaning".  I'm preparing for the long and (in my opinion) dreary winter.  You have probably figured out by now that I'm no stranger to color.  It's something that really makes me happy.  The constant is color, but what color it is can change like the wind.  So, in our transition from summer to winter, my husband and I decided it was time for a family room update.  Something bright, fresh, and clean.  

I can officially say that this is my favorite room in the house.  It's happy, uplifting, and soothing all at the same time.  The major pieces are neutral, with pops of color being the interchangeable accessories, with exception to the window treatments which I make myself so they are typically cost friendly.  


The starting point was the sofas that I absolutely fell in love with.  With a budget friendly price tag, they were a nice fit for us.  I love the clean lines, but that they still pair well with a vintage/eclectic/coastal/cottage style.  The coffee table we have had since our very first apartment.  So, though it's nothing special in appearance, it has some sentimental value.  We bought it(with change we saved in a jar!) from an antique dealer, but it's actually handmade and solid wood.  It's gone through some changes, recently being sanded, restained, and painted and actually started out as a small kitchen table before we chopped the legs off.


Every time I was out and about I kept my eyes out for the perfect throw pillows, but I just couldn't find anything that spoke to me.  I, instead, opted to go to the fabric store and make my own.  I wanted something that had a fun print, but that was a thick woven fabric because let's face it, we use our pillows so they need to be tough.  I couldn't be happier with these cheerful and colorful fabrics!


I am head over heels in l.o.v.e. with the large mirror above the sofa.  This was a $20 flea market find that was gold and had been stowed away in one of our closets for a couple of years.  I knew for $20 I could find a place to put it and I think with a fresh coat of white paint it looks perfect in it's new home.  Also, it's hard to tell in the picture, but there's a white bird cage on top of the T.V. cabinet.  I hope to find a few more to fill the space and may paint them green and aqua.  Not sure that the white is doing the trick for me.


The window treatments are one of my favorite features of the room.  My husband and I married in October 2008 and had a peacock colored wedding.  Not so much peacock feathers, though there were a few, but more just the jewel tones of the peacock.  Anyway, ever since then I have a little "thing" for peacocks.  I've had my eye on this fabric for a few years, so to finally have the chance to use it was fun.  One of my favorite tricks when hanging window treatments is to hang them high, which draws the eye up and makes your windows appear larger, and your ceilings higher.  There's nothing worse than a squatty window ;)  I also had a hard time finding a large(and affordable) piece of art work for the wall in between the two windows so I decided to pick up a brush(for the first time since high school) and attempt my own painting.  It's not a Monet, but I'm pretty pleased with how it turned out.  It incorporates all of the colors I wanted with an ombre effect to it.


This is another little piece that's been with us for quite a while, and now that the walls are aqua, needs to be painted white.  The pretty bird picture is more cheap art.  It came from an Anthropologie calender several years ago and worked quite well in my new space as well as the old.  So, there it stayed.  


Opposite the sofa is the start of a gallery wall.  I'll eventually add more art as I find pieces that fit, but Rome wasn't built in a day(I have to remind my husband!).  With the exception of the temporary cut of fabric in the small oval frame, the rest are Etsy finds.  The tree is cool because it has R+J 2008(our initials and year we were married) in the trunk as if it were carved in there.  


(poor picture quality here)

This print in particular has some sentimental value because it was specially made by the artist(on Etsy) who created our peacock wedding invitations.  I really love that she was able to do this for us!  

So, there you have it!  Our new family room.  I'm sure it will receive a few more things here and there, but for the most part I am thrilled with our new space!


Wednesday, August 29, 2012

Studio Chair Before and After

Since setting up my studio I have been keeping my eye out for an interesting new desk chair.  We used kitchen cabinets for the base of my work space, so the height was higher than that of a normal desk.  I had no idea how hard it would be to find a taller desk chair, so I opted to go for a counter height bar stool.  

I found one in all of it's micro fiber glory and knew that the shape was good for what I wanted, but the look left something to be desired.  Comfort is also key since I can sit for hours at a time making jewelry.  


I found this graphic yellow and white print that coordinated well with the existing window treatments.  My original intention was to make a removable slip cover, but in the end I went with permanently upholstered.  It gave a more fitted, clean look to the chair.

Take a look at the before:


I'm now trying to decide if I want to paint the legs.  They appear black in the photo, but they are a dark espresso stain.  


I really love the extra pop of fun this print gives the room!  I have so enjoyed working in here and now it's just that much more comfy :)


I wish I had taken pictures of the step by step process, but I get too involved when I start projects like these and don't think about that at the time.  What do you think; paint the legs white or no?