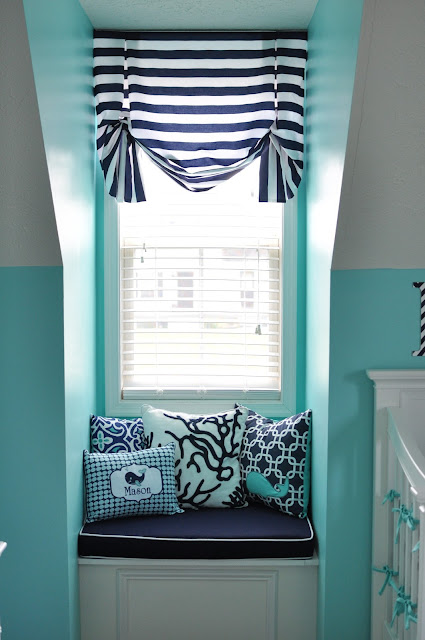
As we near closer and closer to our expected due date, we are rapidly crossing things off of our to-do list. Today, my husband and I finally tackled the built in storage bench. We've talked about doing this for almost 5 years now(since we first purchased our house) in our dormer windows, but apparently baby boy was the kick in the pants we needed to finally get it done.
I am thrilled with how it turned out and it really was an easy and inexpensive project. In total, supplies cost just about $50 for something that really packs a punch. We started off in the nursery, but plan to build one in the matching dormer window in our master bedroom as well.
So, do you want to learn how to build one? Well, here are the steps we took to get it done.
First, we built a frame using 2x4's. We started with the bottom, creating a box using 4 cuts of wood. Each piece screwed into one another with 3" wood screws. Then we added vertical supports in each corner, and topped those off with more 2x4's laying horizontally. This added extra support for the top of the bench.
Once the base frame was built, we moved onto the top. Using 3/4" MDF, we cut the top to fit the space. We then, in a U-shape, cut out a section of the top for the lid to open and close. We gave it a paint job before installing to minimize touch-ups on the wall, but there will still be needed touch-ups once all is said and done. We then used a piano hinge for easy opening and closing. Tip: Make sure to give your lid an overhang so that it's easy to lift open.
After fitting the lid, we then added the front using 1/4" MDF. Again, painted prior to installing. We didn't want to tear out the existing shoe molding, so we instead notched around it and would later fill in gaps with caulk. Using a brad nailer, nail the front and the top to your 2x4 base.
Next, we finished installing the quarter round in front of the built-in to give it that built-in look.
Last, we added this pre-made piece of trim to give the front a little more style. I then caulked around all cracks and gaps and filled nail holes with wood filler. As mentioned before, there are still a few spots that need touch up paint, but for the most part it is done and I love this cozy little spot! Once we add a cushion, it will be ready for cuddling up and reading a book.


.png)


