Starting with the kitchen we painted the boring oak cabinetry a light, creamy white. We bought all new stainless appliances and installed wainscoting. Charm factor...starting to go up! Since then, I haven't done much else to it aside from the usual: paint, window treatments, wall art, accessories.
I have been wanting a backsplash for a while but couldn't quite figure out what exactly. Eventually we want to replace the not-so-charming countertop, so I didn't want to invest in a nice tile backsplash without having the funds for a countertop as well, and the idea of doing the wainscoting on the backsplash is just too much when it's on the lower half of the walls as well.
Enter: Ikea! My friend Elizabeth took me to Ikea last month for the very first time(Yes, i know! Can't believe I have never made the trip before!). In one of their display kitchens there it was...my future backsplash!
So here goes, part 1 of our DIY wallpaper backsplash:
BEFORE


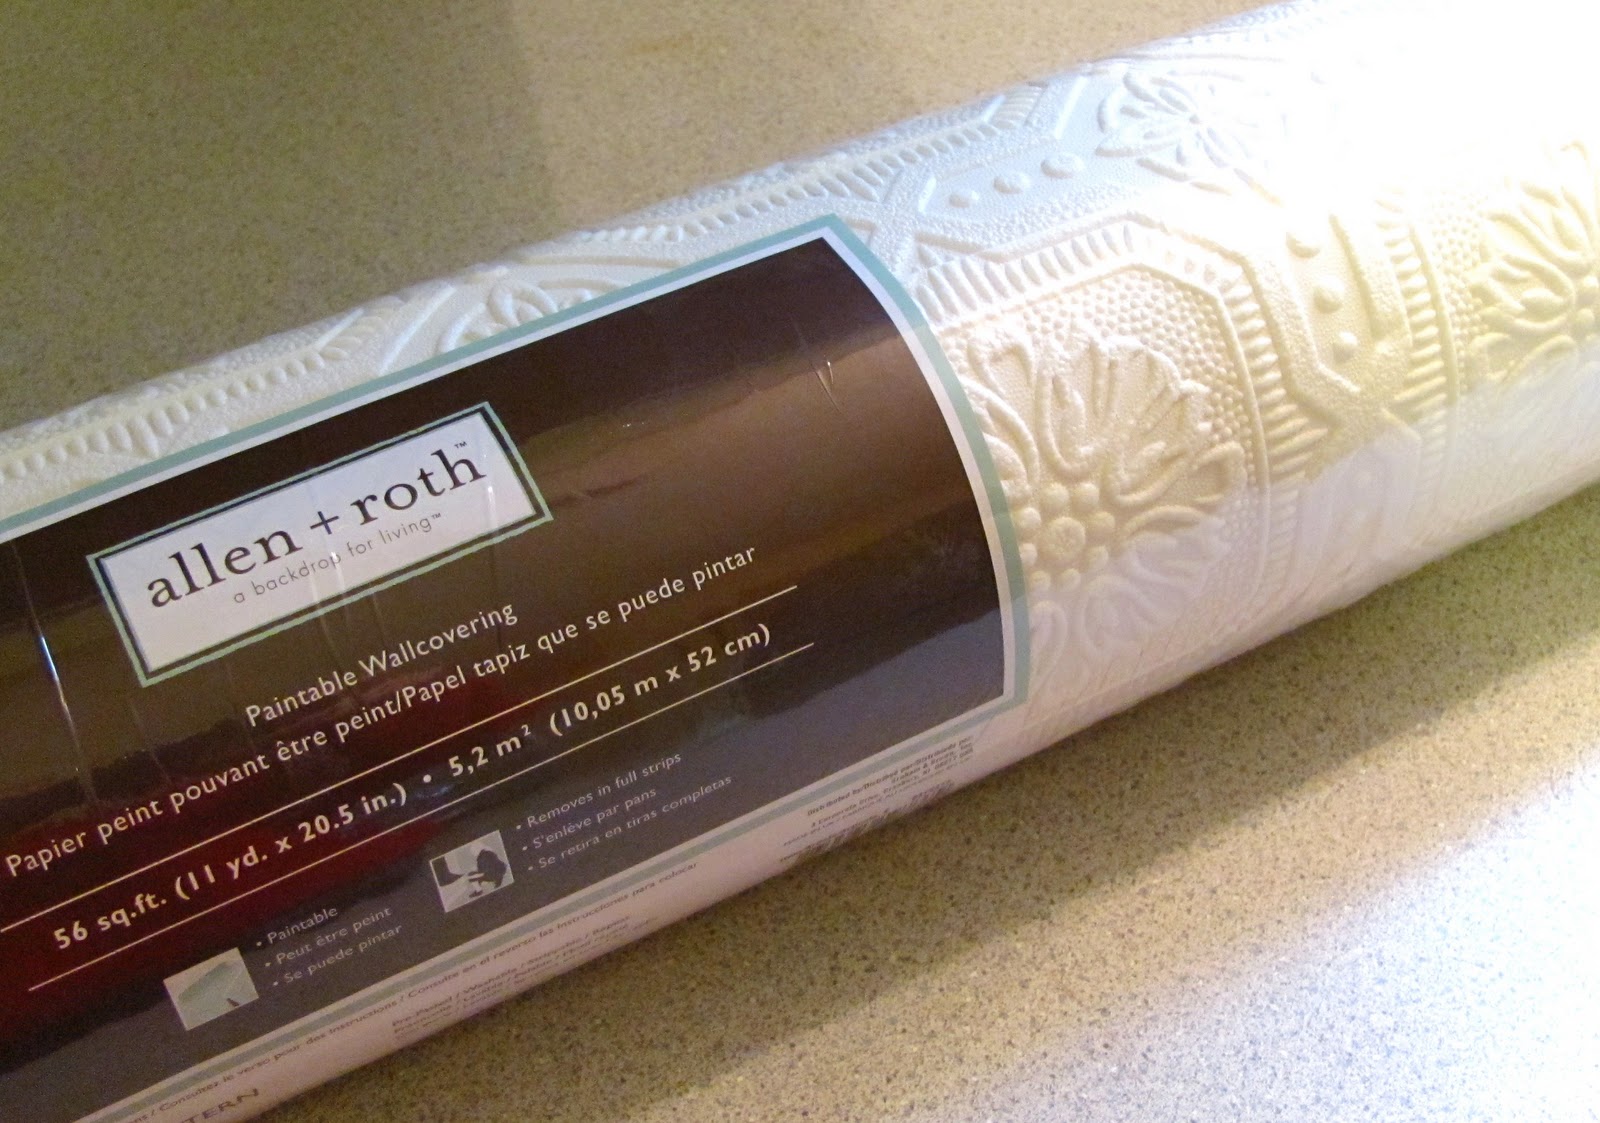


Last step was to wet the paper with a sponge, fold it into itself for 5 mins and hang! Smooth out any bubbles with the smoothing tool, and you have an easy, inexpensive backsplash!


I plan on painting this tomorrow since it is a paintable wallpaper. I'm going to paint it the same color as the wall was originally because I wanted it to be a subtle backsplash since I already have a lot going on in there. Will try to take better pictures of the entire kitchen also!
Total cost of this project $30!!
SO affordable! Even better, we had a couple of gift cards from Christmas, so nothing beats FREE!


.png)


Rachel it looks SO good! You have such patience...I couldn't last through the template process!
ReplyDeleteWhat a great idea!! I'm loving it!
ReplyDeleteLove your blog design too!
Londen
wow-it's looking great!
ReplyDeletei noticed beautiful curtains in the background and a lovely tea towel too!
and, love the wallpaper and template idea-i'll have to remember that trick :)
Wow Rachel you guys did a great job! I love the texture of the wallpaper. I've never been to Ikea either by the way...I think I'd come home with a truckload of goodies and an empty wallet. ☺
ReplyDeleteAngela
how did you finish the ends/sides? Did it lay down flat enough to just leave the edge of the wallpaper or did you put some kind of edging to provide a finished edge? I love this idea but would have one end that would be exposed so am trying to figure out how to "finish" the edge...
ReplyDelete